When my girls started taking online dance and ballet lessons in 2020, they used a chair or furniture from around the house as a makeshift ballet barre. Buying one was an option, but I wasn’t prepared to pay for the postage to Australia – especially as my girls wanted one each. So instead I decided to make them a homemade DIY portable ballet barre.


The cheapest way to make a homemade ballet barre is to buy PVC plumbing pipe and fixings and to cut and assemble them into a barre. The easiest way to make a DIY ballet barre is from galvanized steel pipes as they come in various lengths and are pre-threaded so you just screw all the parts together.
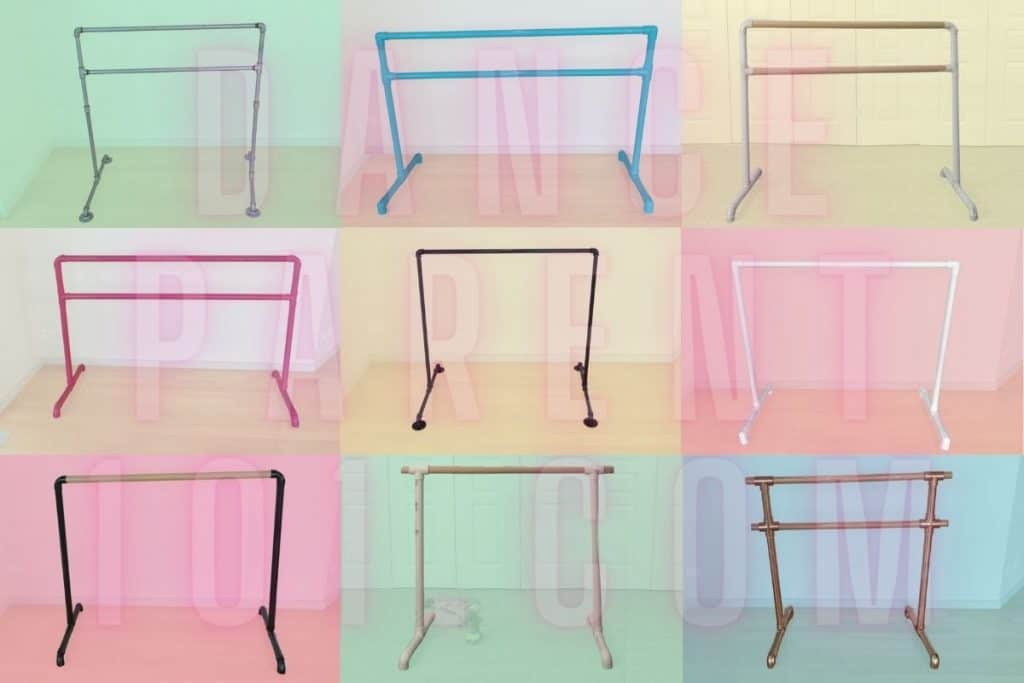

I ended up making 10 different homemade portable ballet barres (look below for the tenth barre, it didn’t fit nicely in the image above!) to test out different materials and techniques so that I could work out which ones were the best for us and also so I could then give you my results, instructions and tutorials on how to make each of them.
So….How Do You Make or Build A Homemade Portable Ballet Barre?
The first thing you need to decide is which DIY ballet barre you want to make! Below are photos of the ten different barres that I made and clicking on any image will take you directly to the instructions and all the information you need as well as a video tutorial on how to make them.
BUT before you decide which one you are going to make you are going to want to consider a few of the following….
- If you wanted to have a portable or fixed ballet barre.
- Your budget
- What tools you already have or are willing to buy
- How much effort you want to put into making the barre
- If you want a heavy or lighter barre.
I will explain these points in detail below in relation to the barres I made, but first…. here are the ballet barres.


Do you want to have a portable or fixed ballet barre.
This article is all about homemade portable ballet barres. They can be easily picked up and moved around. The feet also swivel to the side so they can be stored flat against a wall. If you are after a more permanent solution, I haven’t looked into that a great deal as yet, but have some information on them in my article How to Choose a Kids’ Ballet Barre: Considering All Options.
How much will a DIY Ballet Barre Cost?
Before knowing how much a DIY portable ballet barre is going to cost you, you might want to have a quick look at this article The Best Home Ballet Barres for every dancer which has links to ones you can purchase for comparison and whether you feel the time and effort on top of the cost of a DIY barre is for you!
YOUR BUDGET
Generally, there are two costs involved in making your barre – the materials and any tools you may need to buy. (Plus your time!)
There are three main materials that I used to make my barres. PVC pipe, galvanized steel pipe, and in some cases, I added a wooden barre to create a wood/PVC barre.
The cheapest option of the three is definitely the PVC pipe. Depending on where you buy your materials from, what thickness of pipe you choose and if you choose to make a double or single barre you are looking at a cost between $20 to $40 for your materials. This includes the fixings such as the PVC elbows and tees you will need to assemble the pipe together.
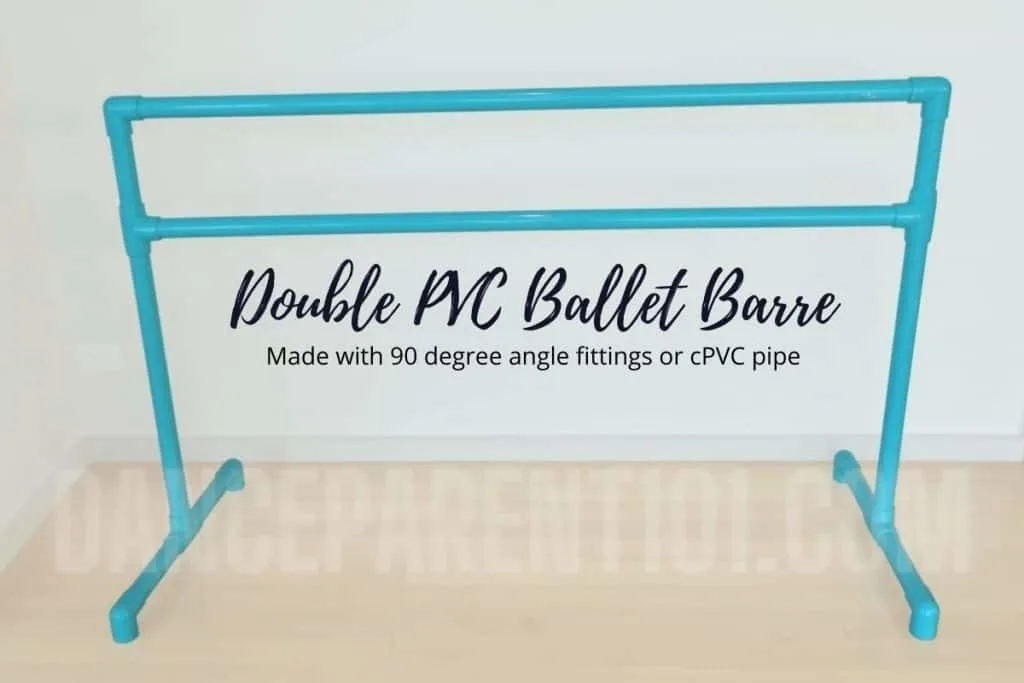
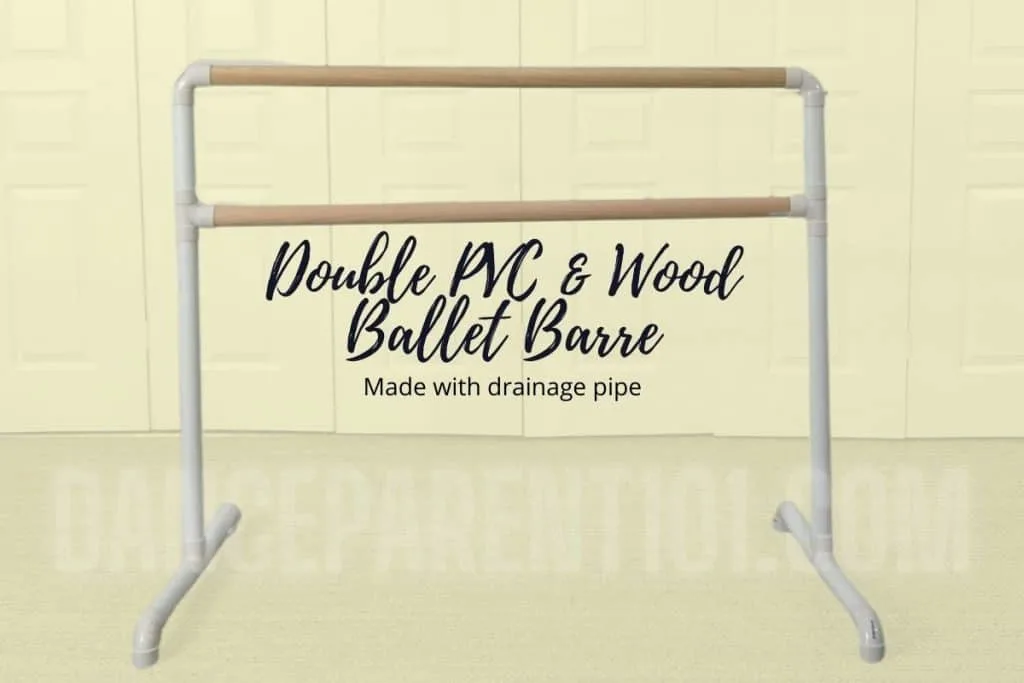
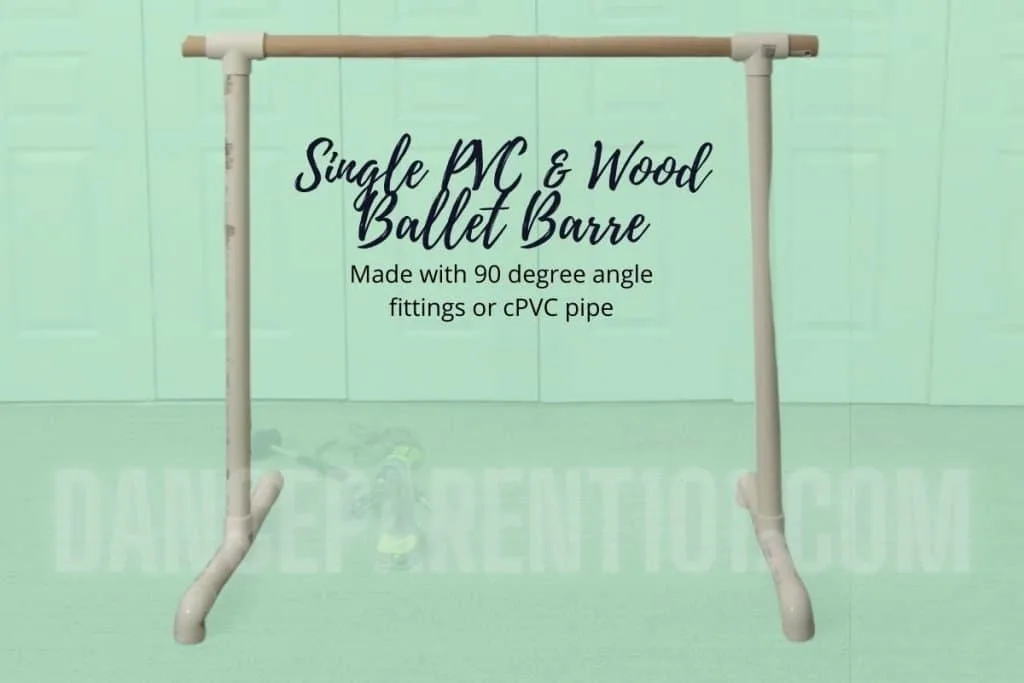
You will also have a choice of Pipe – Grey PVC drainage pipe that is used to plumb houses or white cPVC pressure pipe that is used to plumb pools, irrigation, and hot tubs. Drainage pipe is cheaper, but the fixings – the elbows and tees have an 88-degree angle to help water drain whereas the pressure pipe has 90-degree angle fixings. I made barres using both and prefer the 90-degree angle fixings, but the other pipe still made a usable barre.
On top of the cost of the pipe and fixings, you will also want to secure your barre with either PVC pipe glue or screws or even paint the PVC which can add to your costs.
For an extra $15-$40 again depending on whether you are making a single or double barre and the type of wood you choose, you can add a wooden barre to your PVC. This will reduce your PVC pipe costs as you will buy less of it, but you will also need to buy varnish and sanding paper to smooth your wooden barre so it doesn’t splinter when being used.
The third option that I made were barres from galvanized steel. These were more expensive costing more than $50 each. The advantage of using the steel though is that it comes pre-threaded so you just screw all the parts together to assemble your barre in less than 5 minutes. The steel is also heavier and therefore sturdier than the PVC pipe barres – but the diameter of the pipe is skinnier so the actual barre is a lot thinner under your hand. You can buy wider or thicker pipe, but that comes at a price and also becomes a lot heavier to lift. I used 20mm or 3/4 inch pipe – they also had 25mm or 1-inch pipe, but as I said when it is thicker it is heavier and more expensive.
Another option that I did not use in my ballet barre experiment is copper pipe for two reasons the cost and labour. Copper pipe is more expensive than PVC but around the same price as the galvanized pipe, but more labour intensive than the galvanized pipe, as you still need to cut the copper pipe and secure it somehow.


What tools you already have or are willing to buy
If you choose to make the galvanized steel ballet barre – there is no need for any tools. Just screw and assemble your barre.
But if you choose to make a PVC ballet barre you will need to make sure that you either can source the following tools or have room in your budget to buy them.
- a PVC pipe cutter or hack saw
- Steel wool to clean the ends
- A measuring tape
- Marker
And if you choose to add in a wooden barre, you will also need to have something to cut and sand your wood with unless you are able to get your hardware store to pre-cut the wood instore to the length you are after. You will also need a drill and screwdriver so you can fix the horizontal wood barre into the PVC pipe elbows or tees.
How much effort do you want to put into making the barre?
Making a PVC ballet barre is simple especially once you have the right instructions, but it does take some planning and work to make. You really don’t need any prior DIY or handy person skills to build one especially if you choose to use my clear instructions which you can find by clicking on any of the photos of the barres above. But you will need some space and an hour or less, after you have all your materials and tools to put it together – longer if you intend to glue it and paint it as well – a few days actually as you need to let the glue cure and the paint dry.
Adding on a wooden barre takes things up another notch as you will need to sand and varnish your wood which also takes a little bit of time and elbow grease as you smooth it out.
A galvanized steel barre on the other hand, after you have spent the time looking at the parts you need to buy and actually going to the store (you can actually find some stores who sell the pieces online as well!) will take 15-30minutes to put together and is then ready to use – unless again you want to paint it.
Do you want a heavier sturdier barre or a lighter less sturdy barre?
The saying goes – you get what you pay for… and in this project the saying is true. Although a homemade ballet barre made from PVC is ten times better than using the back of a chair (we know from experience!) it is not going to be as sturdy as either your galvanized steel barre or a store-bought one. PVC pipe is light and if you grip the barre it WILL shift or move – but realistically if you are doing ballet practice a light barre can help teach you to gently touch the barre for balance as you are supposed to anyway. Having all the joints secured with PVC cement or glue greatly increases the barre’s sturdiness as does replacing the horizontal PVC barres with a heavy wooden barre. You can also choose to place weights on the feet as I have seen some dancers do with their store-bought portable aluminum barres to make them sturdier.
We found the double galvanized steel barre to be the most sturdy. I can easily place my leg on it to stretch without worrying it will move and can take the weight of my leg. I can still do this with the PVC barre but you need to use a lot more control when placing your leg on and off the barre. The only thing is that the galvanized steel pipes are thinner than a normal barre, and I find that there is nothing bad about that, it’s just doesn’t have the same feeling if you are used to studio ballet barres.
What can I use instead of a ballet barre?
You can read about all the different ideas we had for alternatives to a ballet barre in the article 14 things you can use instead of a ballet barre? here if you need ideas for what to use before you make yours!
DIY Ballet Barre E-Book
Why try and work it all out on your own, when I have gone and compiled everything you need to know about making a DIY Ballet Barre into a book! Check it out the e-book where we have newly designed instructional manuals, tips and advice as well as links to the video tutorials, all in one location.
For more information on how to make a DIY Ballet Barre head to our DIY HOME BALLET BARRE page or if you would like to buy one instead head to the article The Best Home Ballet Barres for every dancer.