By Becky Dimock / Edited by Samantha Bellerose, B.Ed, Dip.Dance (Performing Arts)
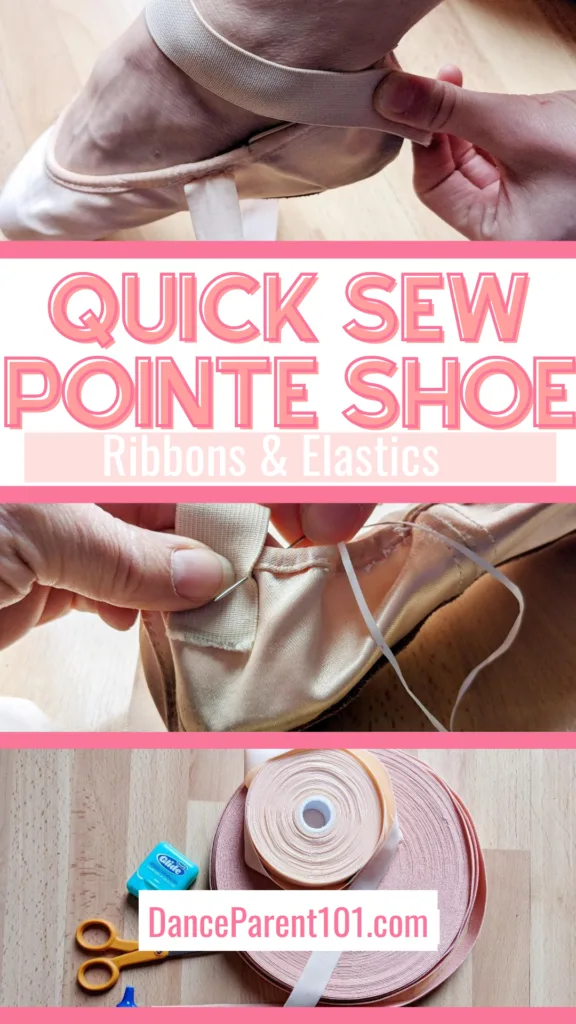
I remember when my oldest daughter came home with her first pair of pointe shoes and the instruction to “sew on the ribbons and elastic”. We were mystified. Where do you attach them? Do you use a sewing machine? How long are the ribbons supposed to be?
Sewing elastics and ribbons onto pointe shoes can be completed with dental floss which is stronger than regular cotton, and because it is coated is less likely to knot or catch when sewing, meaning you can get through the task quickly and efficiently.

Elastics keep pointe shoes from slipping off a dancer’s heel. The ribbons give the feet and ankles vital support when dancing en pointe.
If you don’t want your dancer to possibly injure themselves, you need to make sure the ribbons and elastic are attached properly.
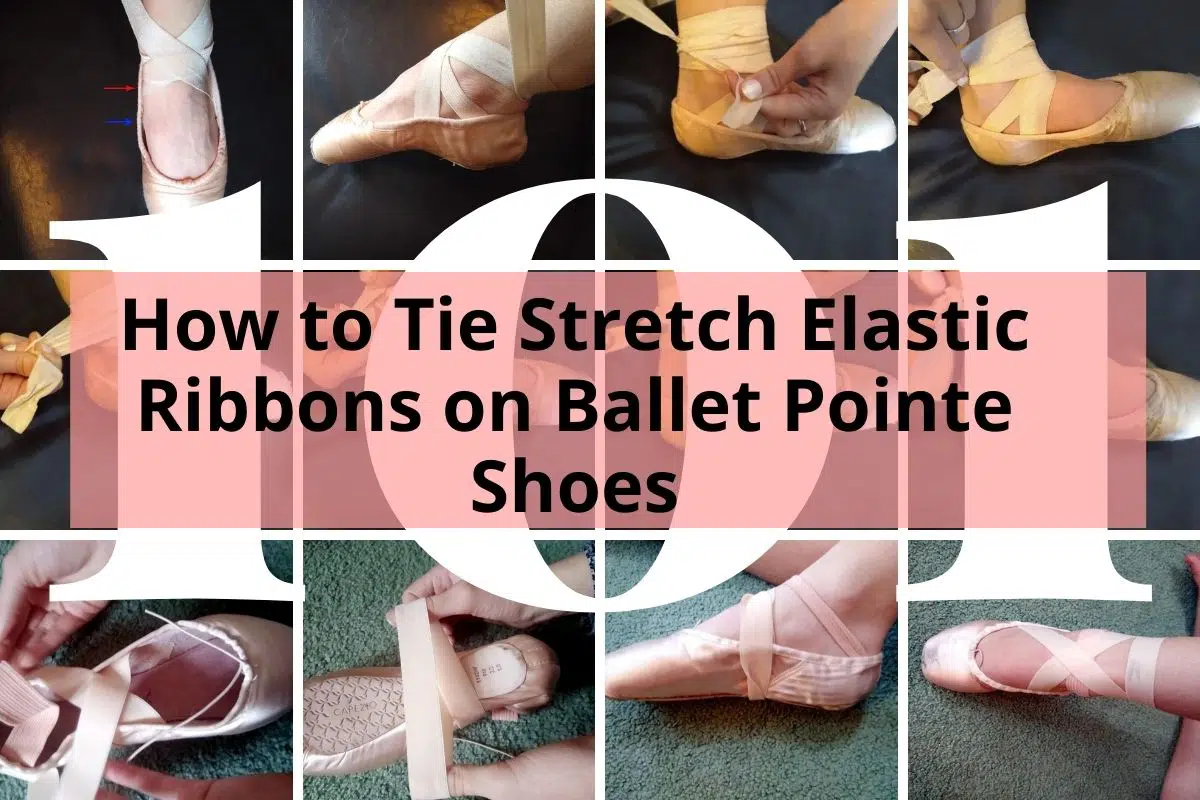
My daughters have both been dancing en pointe for several years now and they sew on their own ribbons and elastics, but I will still sometimes check their pointe shoes and add another layer of stitching or two if the ribbons or elastics aren’t well attached. The following is the method we use for class.
- YOU WILL NEED:
- STEP 1. Determine the length and placement of your dancer’s elastics
- STEP 2. Finish the ends
- Step 3. Sew on the elastics
- STEP 4. Repeat with the second attachment and shoe!
- STEP 5. Determine the placement of the ribbons
- Step 5. Sew on the ribbons
- STEP 6. Repeat on the second Pointe Shoe
- Your Pointe Shoes are Ready for Class!
- My additional Tips for sewing elastics and ribbons on to pointe shoes:
- Other Articles You Might be Interested In
- Check us out on Pinterest!
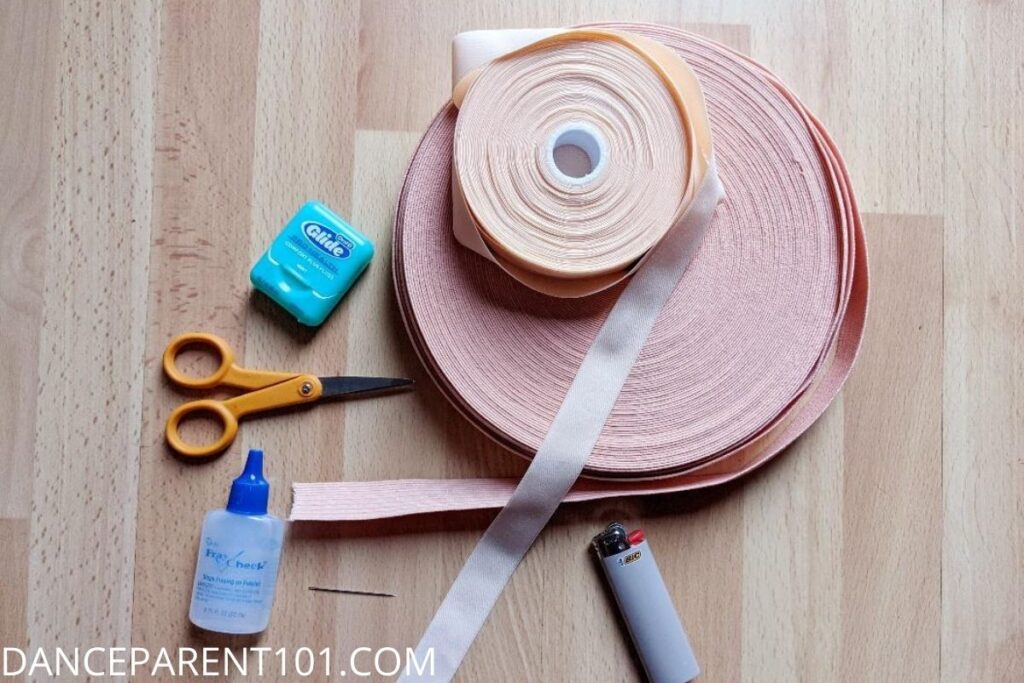
YOU WILL NEED:
- Pointe Shoes
- Scissors.
- A lighter and/or Fray check.
- Pointe shoe elastic (about 7” x 2 for each foot – but don’t cut it yet).
- Pointe shoe ribbon (about 22” x 2 for each foot ribbon).
- Strong thread or dental floss.
- A sharp, sturdy needle. If your needle is too fine, it will probably bend.

Should the ribbons and elastics be sewn on the inside or outside of the shoe?
Traditionally ribbons and elastics were sewn on the inside of the shoe and this is how they should be finished for performances and exams.
As the title suggests, this how-to is about how to do the task quickly!
So in these instructions, we sew our ribbons and elastics on the outside of the shoes for class because it is quick and simple. My girls also tend to wear their pointe shoes with bare feet (padding on their toes of course) so having the ribbons and elastics on the outside causes less irritation to their foot.
However – our Editor Samantha pointed out after reading my article that sewing ribbons onto the outside of the shoe is not acceptable at many dance studios and is more of a habit, professional dancers have gotten into to quickly prepare many shoes at one time for class and rehearsals, as they go through quite a few each week.
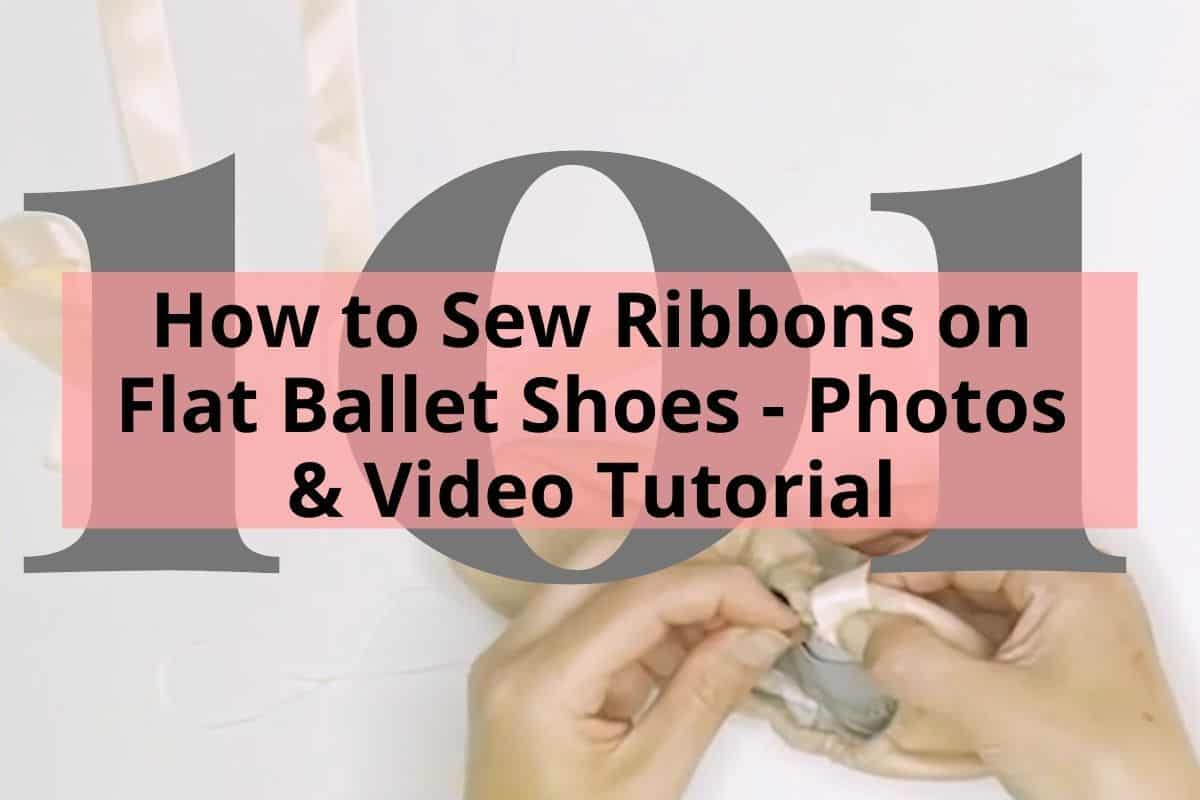
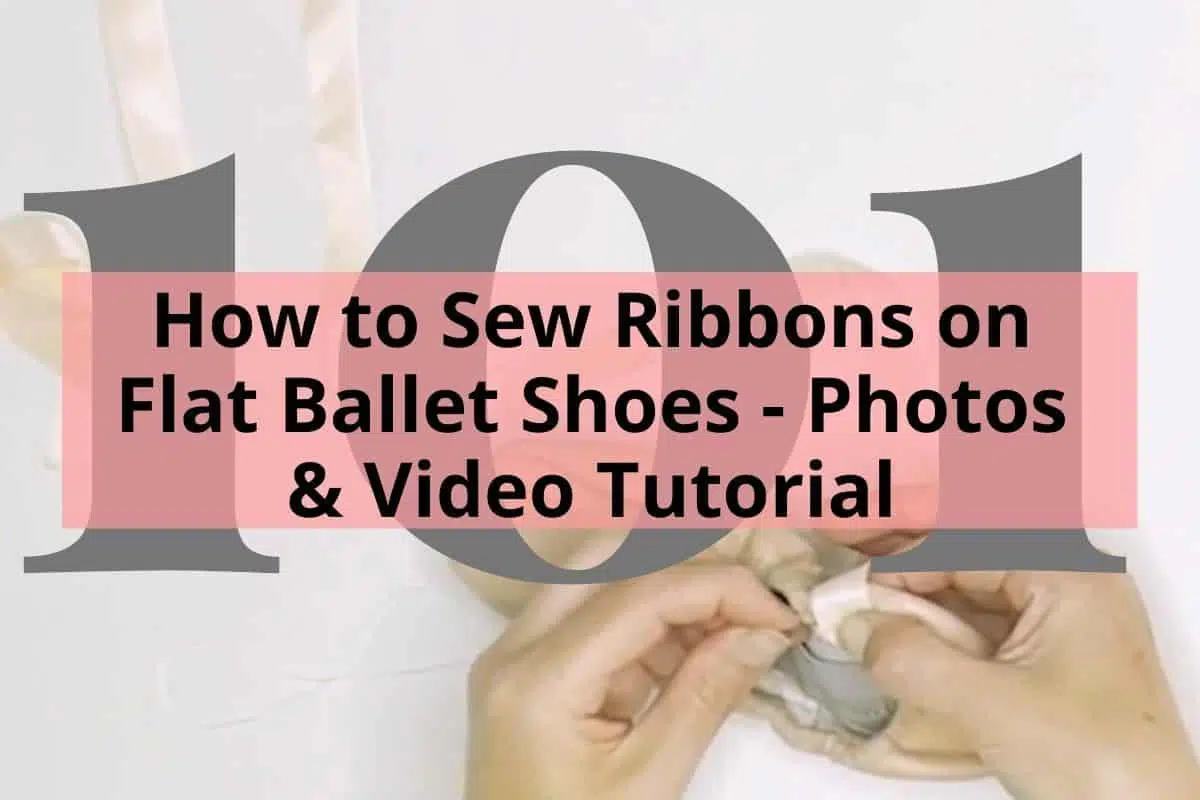
So ask your dance teacher or studio if they prefer the attachments to be hidden for class – if so you can use the same method but sew both the elastics and ribbons to the lining of the inside of the shoe instead so even the stitches are completely hidden on the outside of the shoe! We do that in our instructions for flat ballet shoes here!
ATTACHING THE ELASTICS
STEP 1. Determine the length and placement of your dancer’s elastics

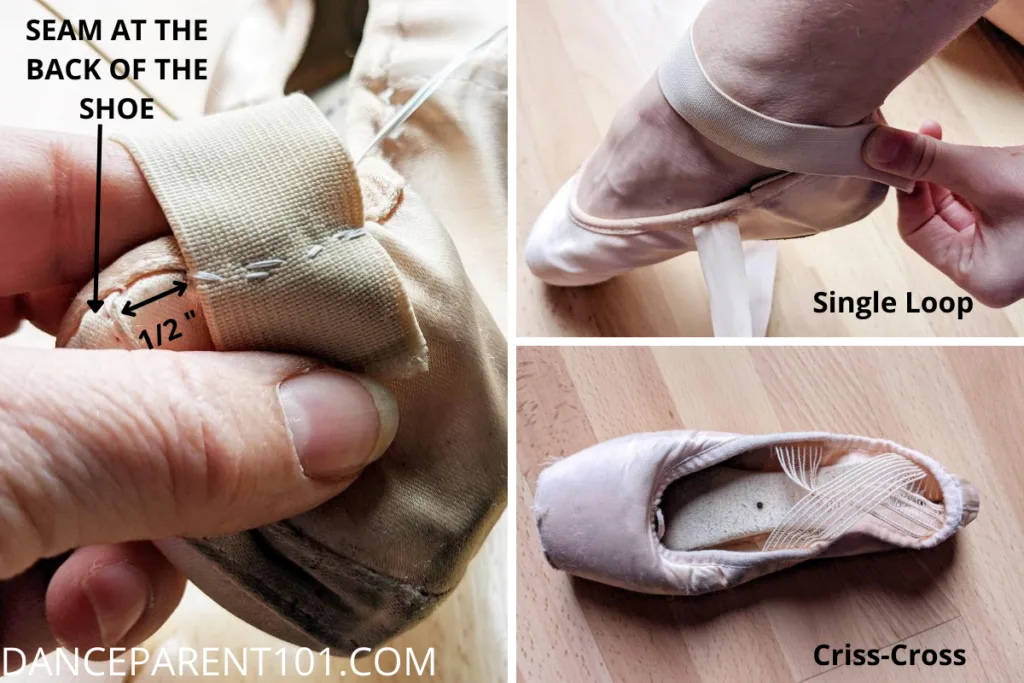
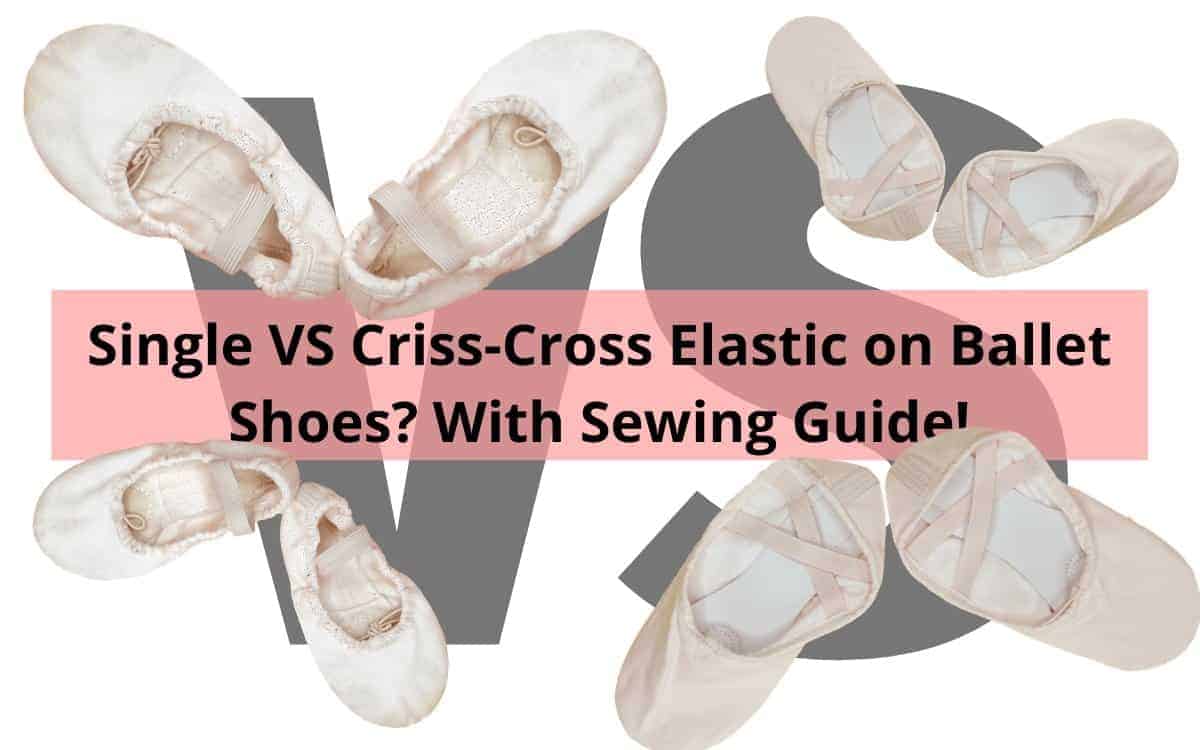
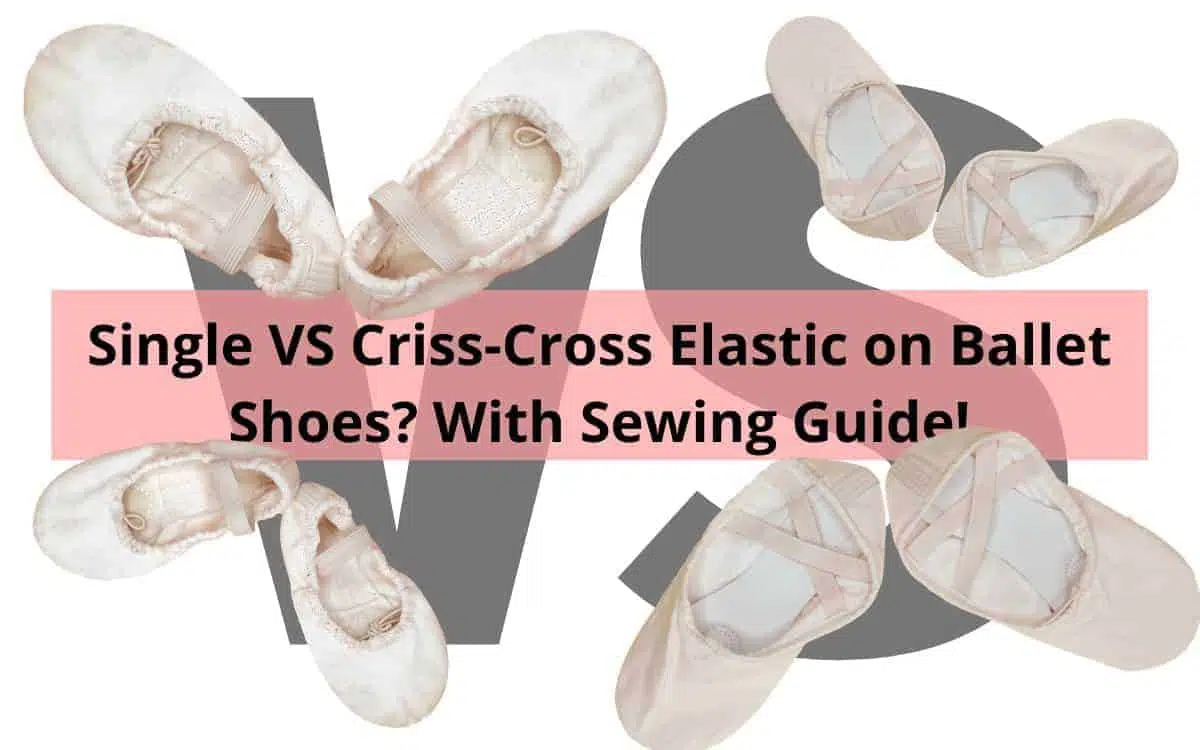
In these instructions, we are sewing one loop of elastic around the heel, as that is what my dancers prefer. cers prefer.
An alternative is to sew on two crisscrossed elastics. This is how elastics are sewn onto most flat ballet slippers which you can read about in our article here if you are not sure what that looks like or one looped elastic that goes around the ankle.
For placement, the elastic wraps around the ankle once with each end of the elastic attaching to the pointe shoe approximately 1/2 an inch from the seam at the back of the heel. You can mark this with a pencil or a pin.
This measurement is approximate as it will depend on how long your dancer’s ankle is, how long the heel of her shoe is, and her personal preferences. There are some dancers who sew the elastics so close together they are right ontop of the seam and others prefer them to be further apart.
The elastics should lie flat against the dancer’s foot and ankle. They should be tight enough to keep the shoe on the dancer’s foot, but should not hurt.
After measuring, cut the elastic so you will have about ½” beyond the stitching line. My daughter’s one loop is about 7” long. For two elastics, each will be about 7” long.
STEP 2. Finish the ends
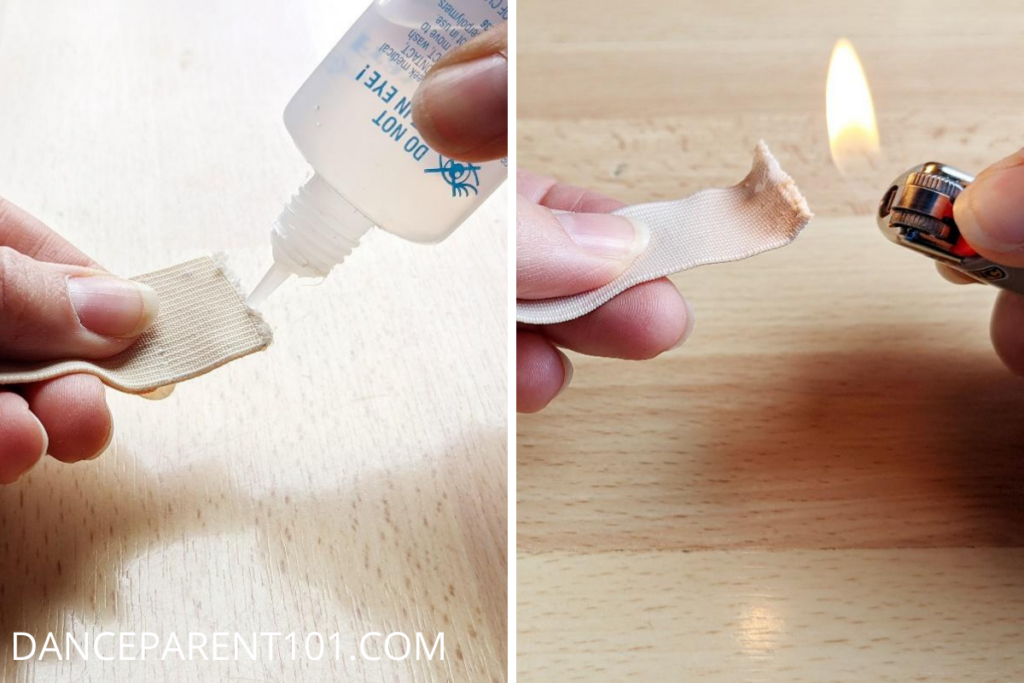

Finish the edge of the elastics and ribbons with fray check or fray stop if the elastic is primarily made from cotton as it will not melt.
If the elastic is made from a synthetic such as nylon it will melt so you can just run a flame over the end.
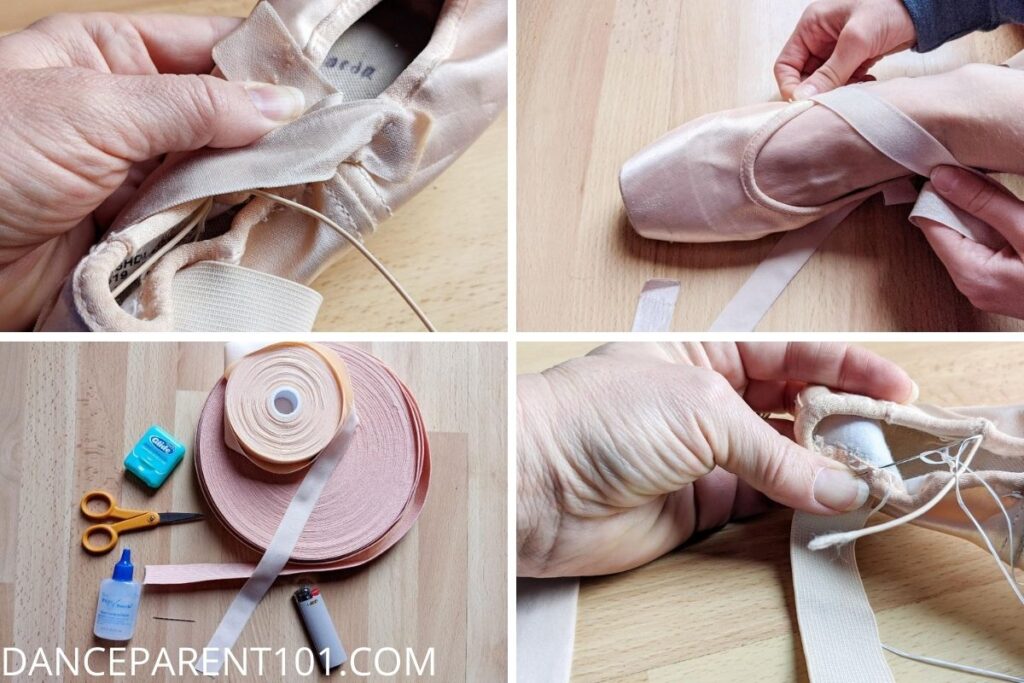
Step 3. Sew on the elastics

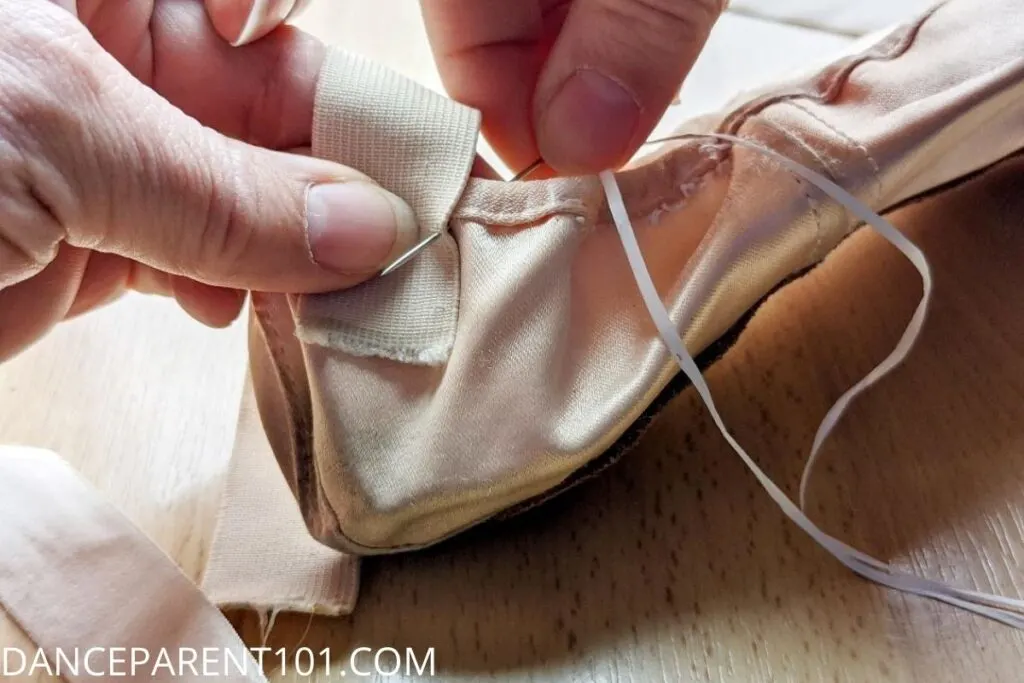
Sew on the elastics in a running stitch (or “up-down” stitch) right along the edge of the casing. It is at this stage that you need to decide if you sew them on the inside or outside the shoe. My daughters prefer them on the outside of the shoe because it doesn’t rub their feet, but it’s just a matter of personal preference or what your dance studio allows.
Your elastic should stick out about ½” beyond the stitching line. If it doesn’t, the stitches can rip through the ends of the elastic essentially pulling the elastic off.
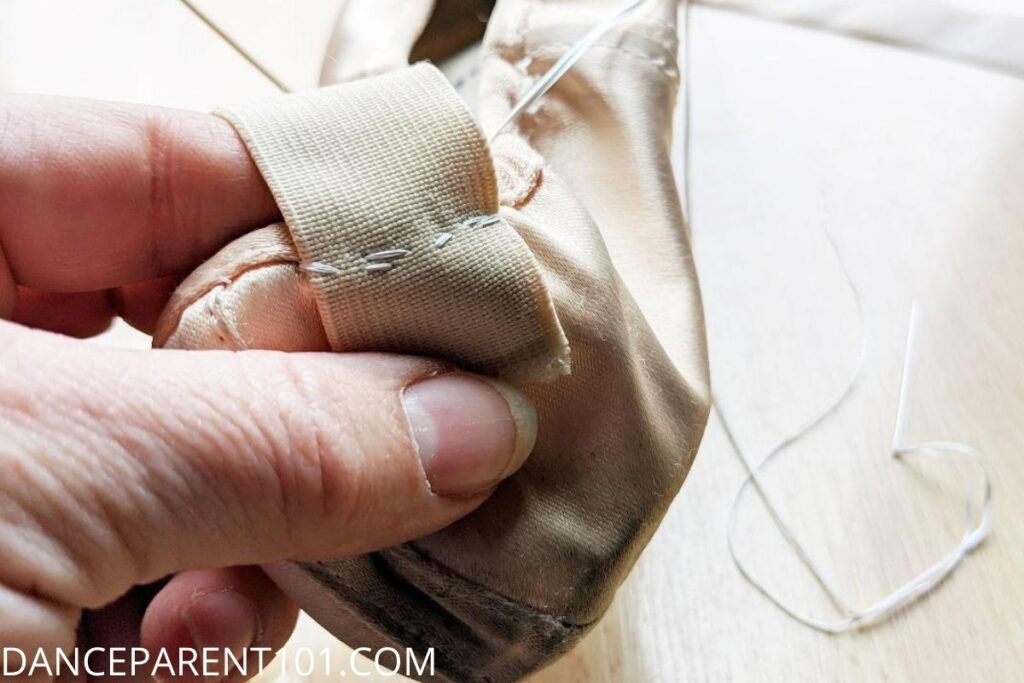

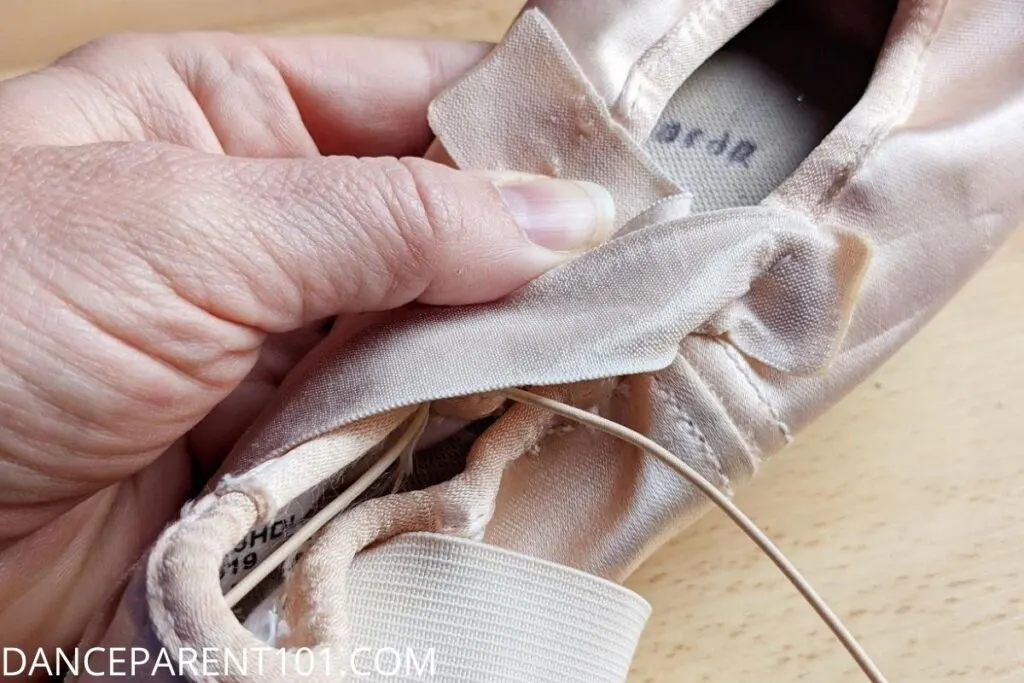
Stitch along the line twice, then tie a knot. To tie a knot, after your last stitch going into the shoe, pass the needle through a small part of the casing on the inside of the shoe, but don’t push it back through to the outside of the shoe.

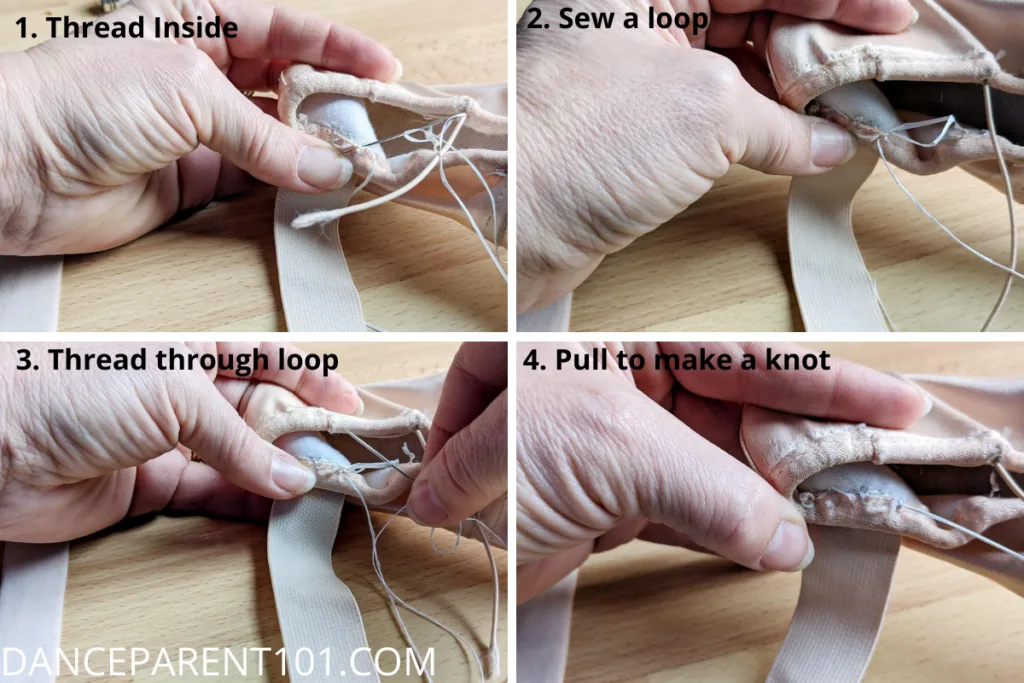
Pull it almost all the way, but leave a small hole in the thread.
Put the needle through the hole and pull tight. Make another knot the same way to ensure that it’s secure.
STEP 4. Repeat with the second attachment and shoe!
You are now ready to sew the second attachment of the elastic. The most important thing to remember here is to not twist the elastic, make sure it lays flat against the ankle!
Once this shoe is done, you can complete the task on the other shoe. (Are you starting to see why some people prefer to do this on the outside of the shoe!)
ATTACHING THE RIBBONS
STEP 5. Determine the placement of the ribbons

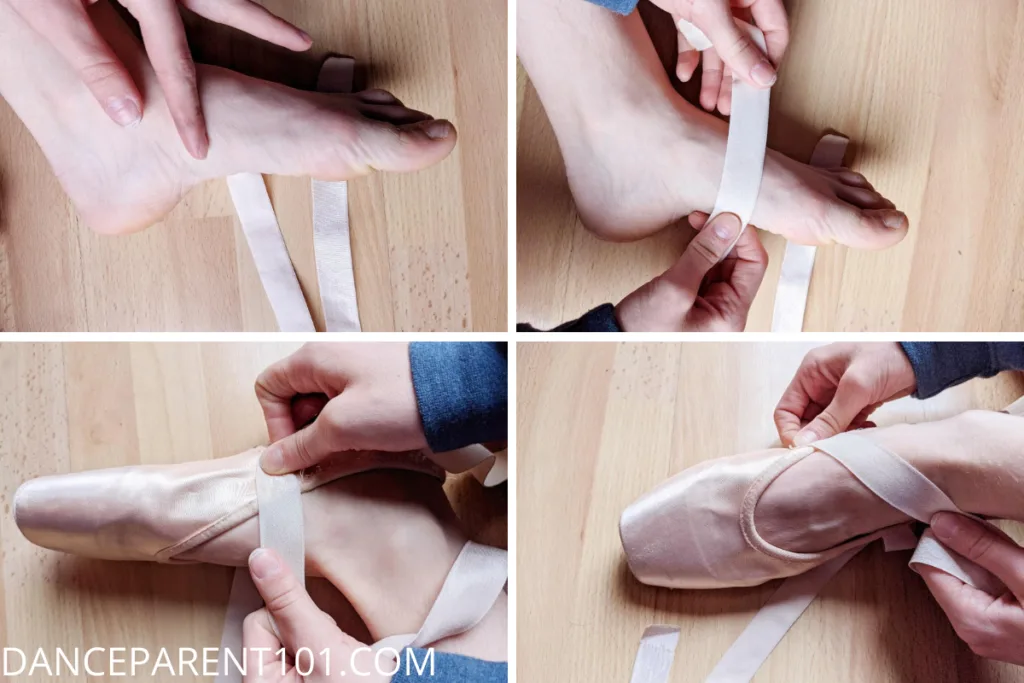
The ribbons are a crucial part of your dancer’s pointe shoes. They help support her ankles and make sure she doesn’t go too far over her box. Therefore, it’s important that you get them sewn on in the right place. Before you have your dancer put on the shoe, look at her foot and find the highest point of her arch. That’s where the ribbons should be sewn:
Now have her put on her shoe and note where that same location is. The ribbons should be attached there. If you have a hard time finding the right spot, have her hold the ribbon on her foot in the proper place, then put the shoe on, with the ribbon still there. Mark that location on the pointe shoe with a pencil.
Step 5. Sew on the ribbons
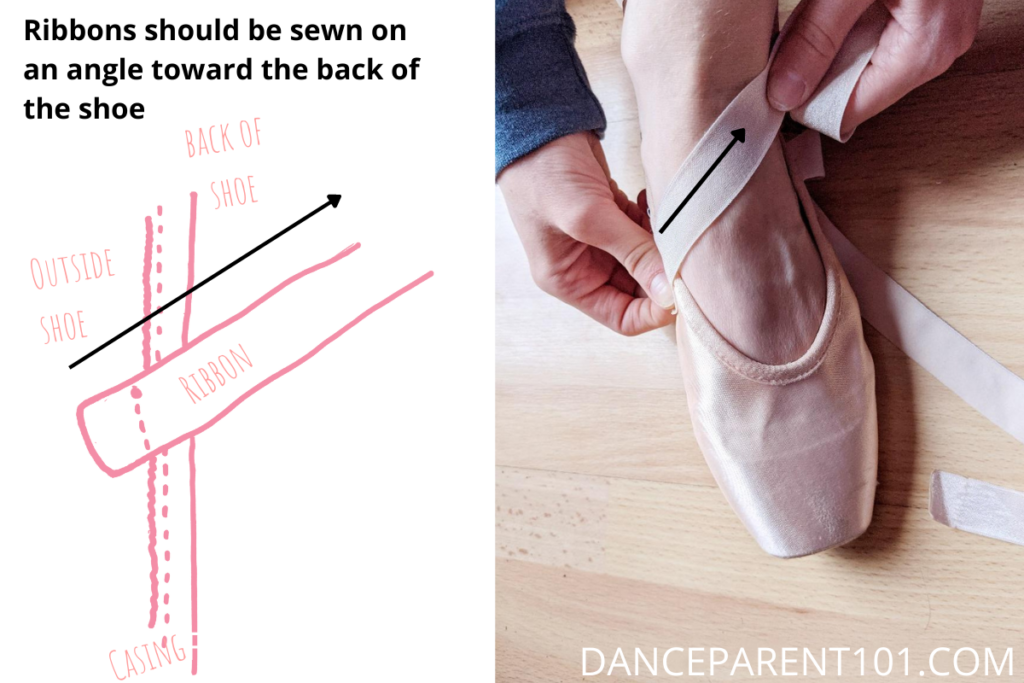

Use the exact same sewing technique you used for the elastics to attach the ribbons to the pointe shoes.
The difference here however is that you will need to angle the ribbon towards the ankle so it lays flat when the ribbons are tied. The degree of the angle will depend on the shape of your dancer’s foot, so anywhere between 45 and 90 degrees will work.
The second ribbon will go directly opposite the first one, at the same angle.

STEP 6. Repeat on the second Pointe Shoe


That is the sewing part all done. You will still need to cut the ribbons to length and melt the ends so they don’t fray.
You do that by tying the ribbons around your dancer’s ankles as you normally would have done for your dancer’s flat ballet shoes and then cutting them with just enough left to tie and tuck them away.
Check out our instructions for sewing flat ballet shoes here, where we go through this last part step by step with photos and video!
Your Pointe Shoes are Ready for Class!
You can see that the entire process can be time consuming, and for some people sewing the ribbons on the outside of the shoe is quicker as you are not having to focus on ensuring you are not going through the layers of fabric and glue of the shoe slipper, which is what you usually are trying to achieve when sewing them from the inside.
This is because when you sew them on the inside you are aiming to make the outside of the shoe stay flawless, so you cannot see any of the stitching or the attachments. This takes time and practice to master!
My additional Tips for sewing elastics and ribbons on to pointe shoes:
1. If you’re having a hard time getting that thick thread or floss through your needle, use a needle threader. It’s the only time I’ve ever actually used one, but it works like a dream!
2. As you can see in the Materials photo, you can get rolls of both ribbon and elastic. This will save you money eventually. As you can see I still have quite a bit left over after putting ribbons and elastic on my two daughters’ pointe shoes for several years, so you might want to go in on a roll with a friend.
3. You can often re-use the ribbons from dead pointe shoes several times. I would not however recommend re-using the elastics as they lose their elasticity and support.
4. Those dainty-looking shoes can actually be quite tough to sew through. If you’re having a hard time getting the needle through, use a thimble. I’ve had needles push through my fingernail when I’ve tried to skip the thimble!
5. Make sure your dancer keeps a needle, thread (or floss), thimble and small scissors in her dance bag in case she needs to do emergency repairs.
Other Articles You Might be Interested In


Check us out on Pinterest!