By Becky Dimock / Edited by Samantha Bellerose, B.Ed, Dip.Dance (Performing Arts)
Everyone knows the frustration of spending time and money on costumes that only last a couple of performances. It’s hard to know how to best balance cost and quality.
I make a lot of the costumes for my daughter’s dance studio and have been doing so for a while now and have gained a lot of knowledge and experience doing so. Today I am sharing some of my top tips so you too can create costumes that last but don’t break your budget.

- 1. Handmade is Better – From my Experience!!!
- 2. Start Sewing Classes and Workshops to Teach Students and Parents to Sew!
- 3. Always Plan Ahead – Think Beyond this Seasons use of a Costume!
- 4. Buy the right Tulle and Cut it the Right Way!!!
- 5. Lycra can be a bane or a blessing
- 6. Stay Clear of Hard to Maintain or Materials that do not stretch like Satin
- 7. Use Simple Good old Cotton For Costumes that Last!
- 8. Sewing for Reuse – Use Wide Seam Allowances
- 9. Learn Top Tips for Refitting a Costume
- 10. Use Sewing Shortcuts that will help keep your costumes reusable for longer!!
- 11. Sew to make Removable Decorations and Embellishments for Reuse
- 12. The Importance of Costume After Care
- At the End of the Day – Parents and Dance Students Will Appreciate It
1. Handmade is Better – From my Experience!!!
First, handmade costumes are typically going to last longer, will usually fit better, and will always be exactly what you want, instead of settling for something commercially made.
If you have just a few people who know how to sew, you might have to prioritize which costumes are made and which are purchased.
When you can’t make them all, purchase costumes that you need a lot of, for dancers who won’t be on the stage a lot, are too difficult for your sewing team, or are not cost-effective to sew (like pajama pants).
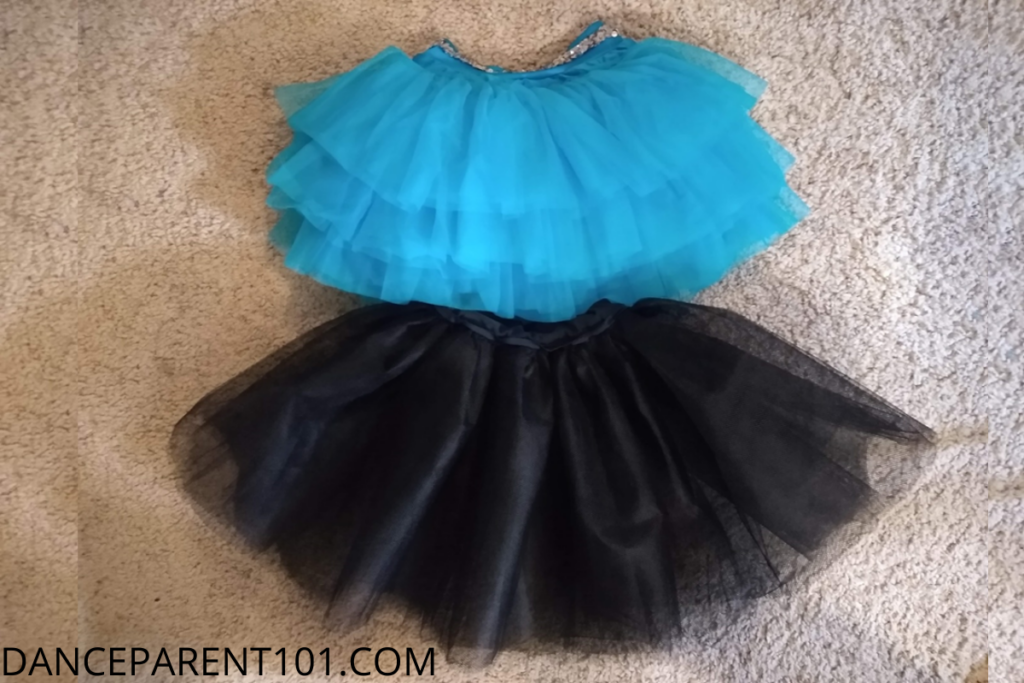
Both of these tutus are for 7-year-olds. The top one is store-bought and the bottom one is homemade.
On stage they both looked great, but because I made it – I can alter and add to it and it can be reused over and over again. The bought one however has it’s limitations for me to do this – especially on the altering size side of thing!

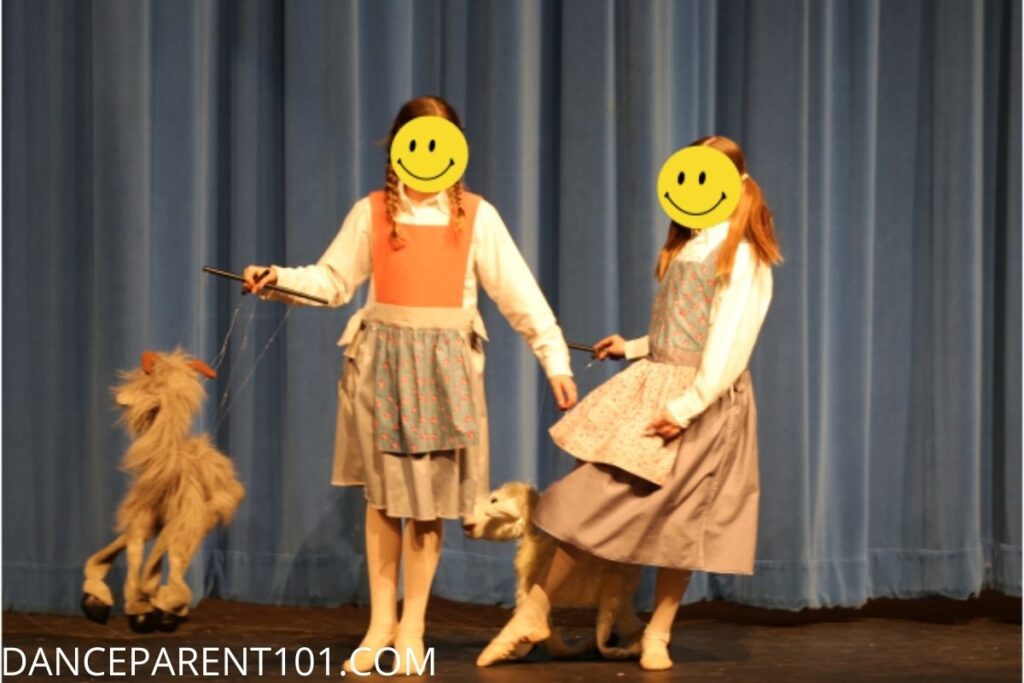
For example, we have a duet to “Sisters” from “White Christmas”.
We couldn’t find the perfect turquoise dresses with a circle skirt and lace-covered bodice, so we made them.
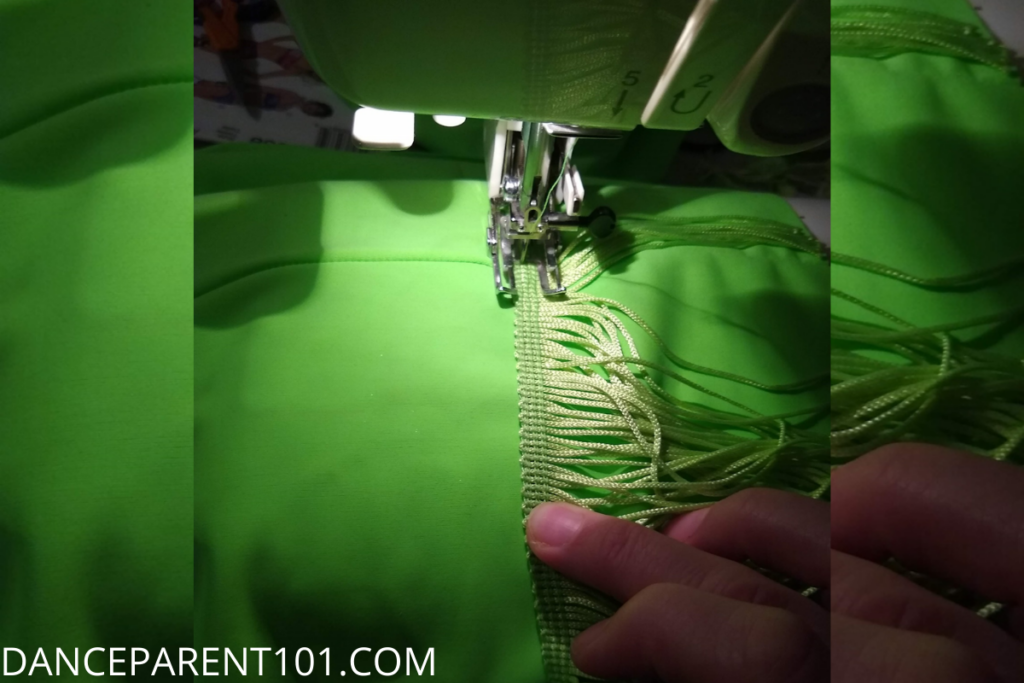
We’ve also made lime green flapper dresses with rows of fringe for a fun “When I’m Human” dance (there is a photo of me sewing on some fringing on that later on), as well as numerous period costumes that are hard to find or expensive to buy.


2. Start Sewing Classes and Workshops to Teach Students and Parents to Sew!
If you have a small sewing team, consider having a sewing class when no costumes are being actively created. Invite parents, dancers (boys too!), and anyone interested.
Teaching dancers and parents how to sew ensures that they respect the work that goes into the costumes. Dancers will take better care of their costumes, will be able to help each other if there’s a costume emergency, and parents will better understand why studios charge show fees and will enjoy helping shows come together.
Everyone can help with costumes in some way – from tracing patterns to cutting fabric and doing handwork, there are lots of simple tasks that even unskilled helpers can do.
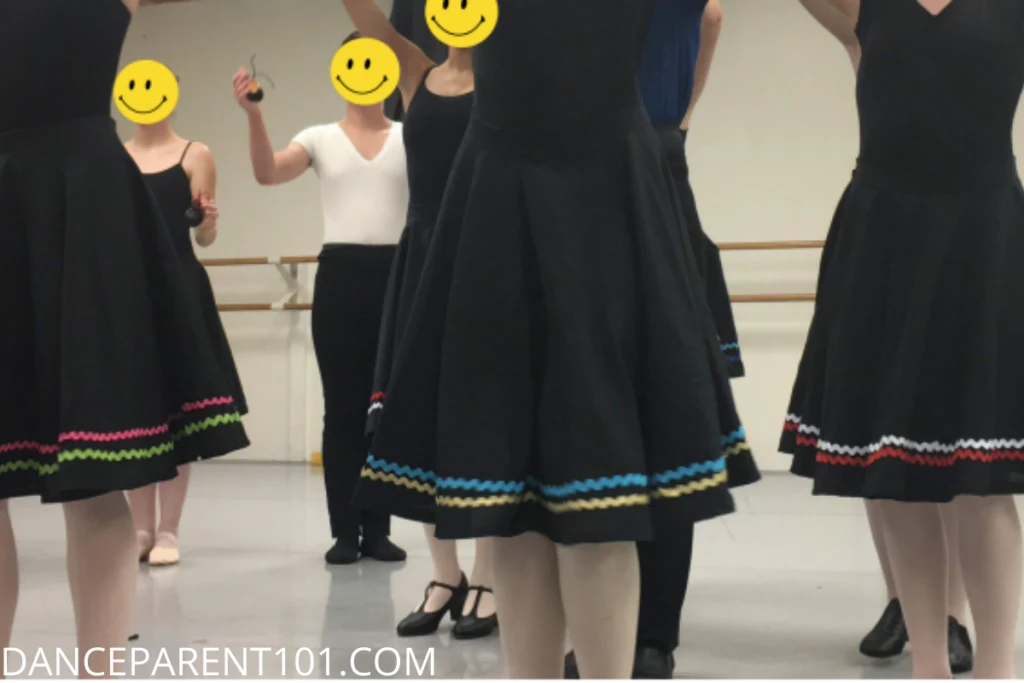
At our studio, we had a sewing class during our summer intensive one year. Every girl made a circle skirt and every boy made a pair of shorts, then they wore the costumes for the final showcase performance. They were so proud of their work, and they’ve all worn those costumes again.
Below are the girls wearing their skirts in class, it really was a great project as they use them so often!!!

3. Always Plan Ahead – Think Beyond this Seasons use of a Costume!
When planning costumes, consider whether you can design costumes that can be used for multiple performances.
For example, can you make a simple dress and add temporary decorations for different performances in the future?
Can you make a leotard and skirt instead of a dress, so they can be mixed differently later?
I had a pattern that called for a petticoat to be sewn in. Instead, I put a waistband on the petticoat so we could reuse it for different costumes.
Also, I always get enough fabric to make an additional costume just in case we need it later.
Be on the lookout for pattern sales and pick them up when they’re a good price. That goes for thread and elastic too!
These costumes are reversible, with a dark side and a brighter side, instead of making multiple dresses:

4. Buy the right Tulle and Cut it the Right Way!!!
We use a lot of tulle when sewing dance and ballet costumes. Tulle is an opaque material that skirts and tutus can be made out of. It is light and flows well, helping to showcase a dancer’s movements on stage.
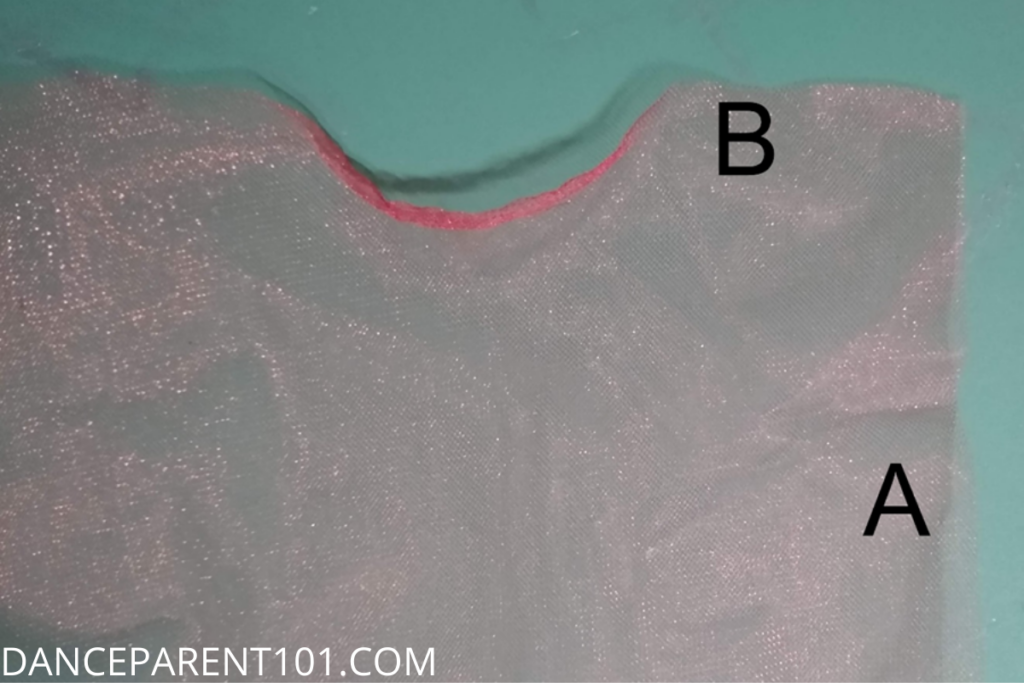
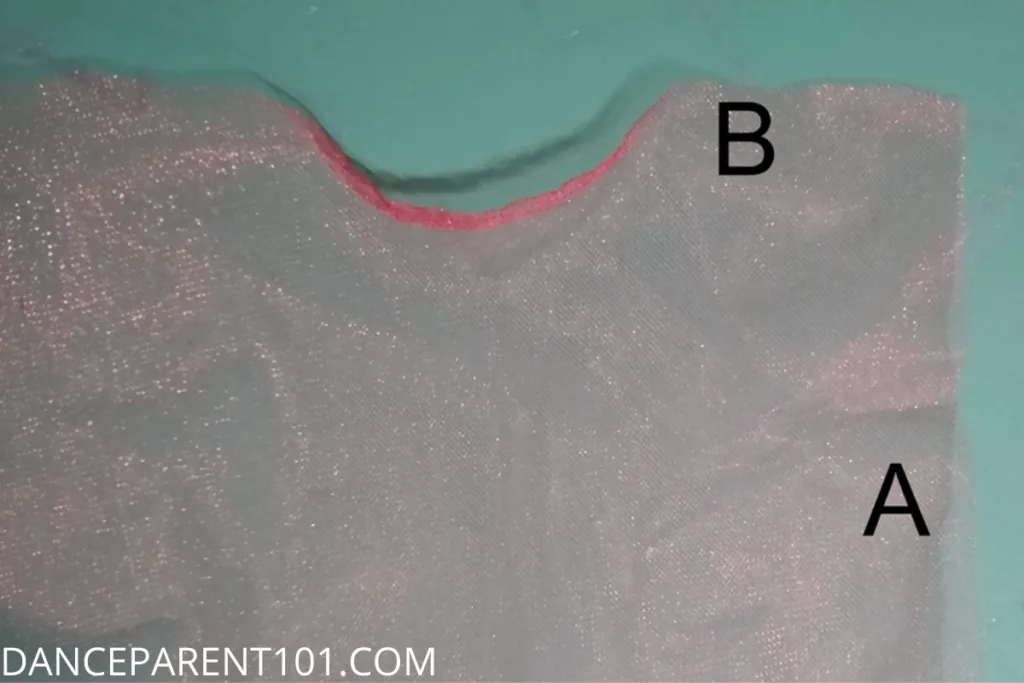
I can’t stress enough how important it is that you cut your tulle correctly.
You can cut it either “railroad” style, where you cut one long piece for each ruffle / layer, or “standard”, where you cut the tulle across the fabric width and sew several widths together for each ruffle / layer.
To determine which way to cut your tulle, give each edge a good pull. If one side bounces back and looks normal, use that as the bottom of your skirt.
If you pull one side, and it makes a little crushed roll once you let go – do not use that as the bottom of your skirt.
If your tulle rolls on both edges, don’t use it at all.
Skirts made that are cut the wrong way will not last.
The edges will eventually stretch, sag, and roll, just like when you pulled on the fabric. You won’t be able to steam or press out the rolls and wrinkles.
In the following example, you can see that after pulling each edge, side A keeps its original shape, while side B rolled up. As long as I use side A for the bottom of the skirt, I can use this tulle.
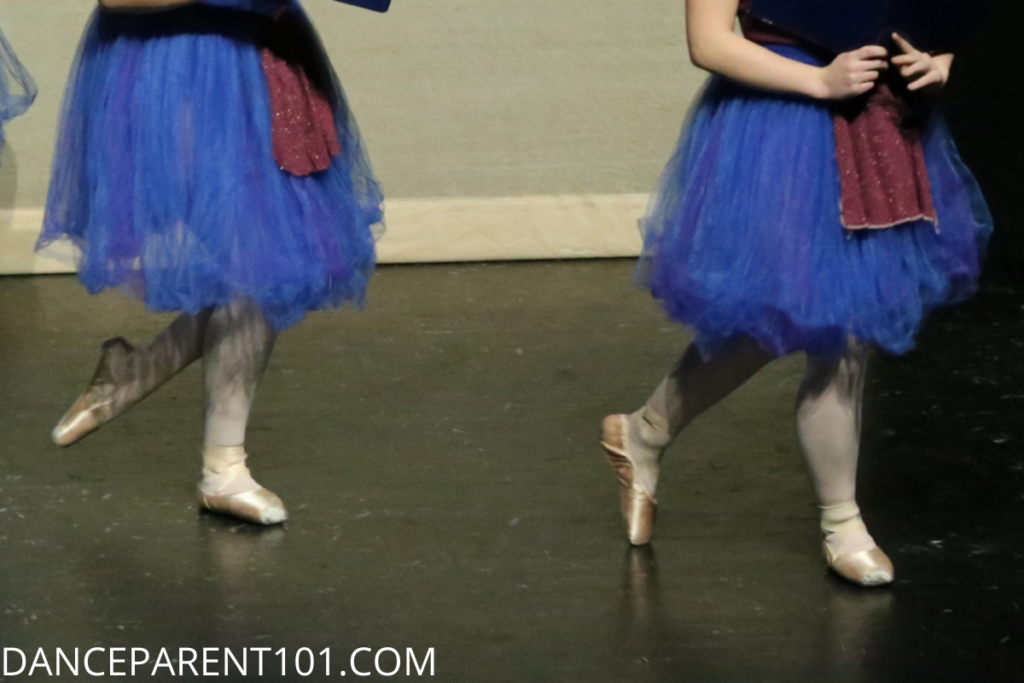
Here’s an example of what eventually happens when you use the wrong edge of tulle for the bottom of your tutus:

5. Lycra can be a bane or a blessing
Lycra can be a good choice of fabric because it doesn’t need to be hemmed, doesn’t wrinkle, moves nicely, can fit a wide range of bodies, and is easy to care for.
As long as you have a serger or overlocker sewing machine, it’s a dream to sew. And have you ever used a lycra-based velvet? It’s a perfect choice for winter show costumes!
On the downside, if lycra gets snagged, there’s just no good fix (keep all Velcro far away from lycra!!), and if you don’t have a serger or overlocker, it’s hard to sew.
If it does have to be re-sewn, it’s hard to take apart those serged seams (but not impossible – I’ve done it several times).
On balance, I feel that the benefits outweigh the difficulties, so we use it a lot at our studio.
Just make sure to get high-quality lycra that’s not super thin.
In the following photo I am Serging some lycra pants that our dance studio will be using as a costume.


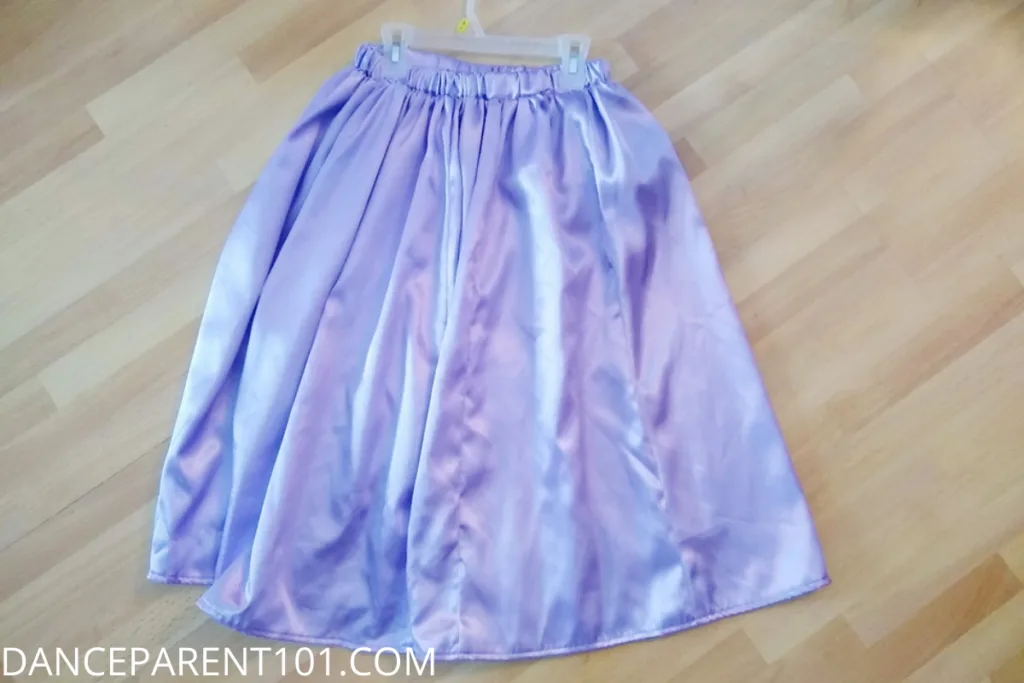
6. Stay Clear of Hard to Maintain or Materials that do not stretch like Satin
I avoid satin unless it’s absolutely necessary.
It ravels and wrinkles and snags and even water (and sweat) can stain it, so it’s a nightmare to travel with!
There’s no give to it, so if a dancer bends in it a little too far, it’s easy to tear out seams, with no way to fix them.
It’s almost impossible to resize because if you let out seams, you can sometimes see the old holes and it’s really easy to cut the fabric when cutting off trim, hooks and eyes, etc.
If you must use satin (I admit that it does flow and shimmer nicely in the light), get something high quality (it’ll be thicker and more expensive).
Steaming it is usually better than pressing it with an iron. You won’t melt it or iron in wrinkles, and it’ll sometimes get out any pinholes or stitching holes.
This satin skirt wrinkles easily, even though we made it with a nice thick fabric. The lovely sheen ensures that every wrinkle is seen on stage, too:

7. Use Simple Good old Cotton For Costumes that Last!
Woven cotton is perfectly fine for many dresses, bodices, and even skirts. Anything that doesn’t need to be stretchy or shiny can be made out of a nice woven cotton. It’s easy to clean, easy to press, easy to store, and is by far the easiest to repair.
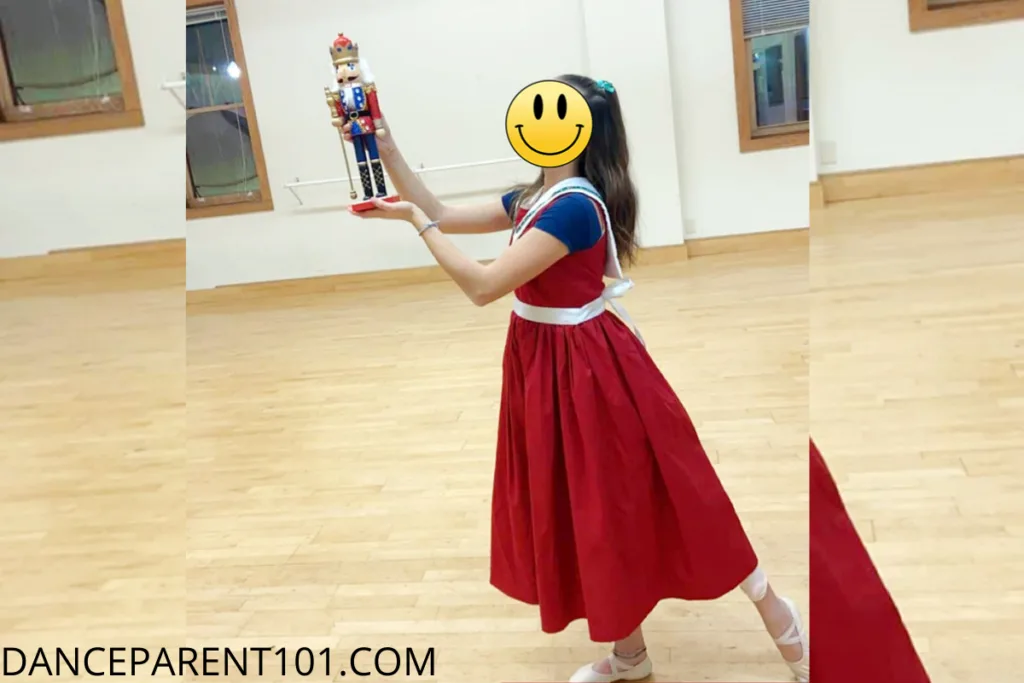
Our Clara dresses are always made of cotton:

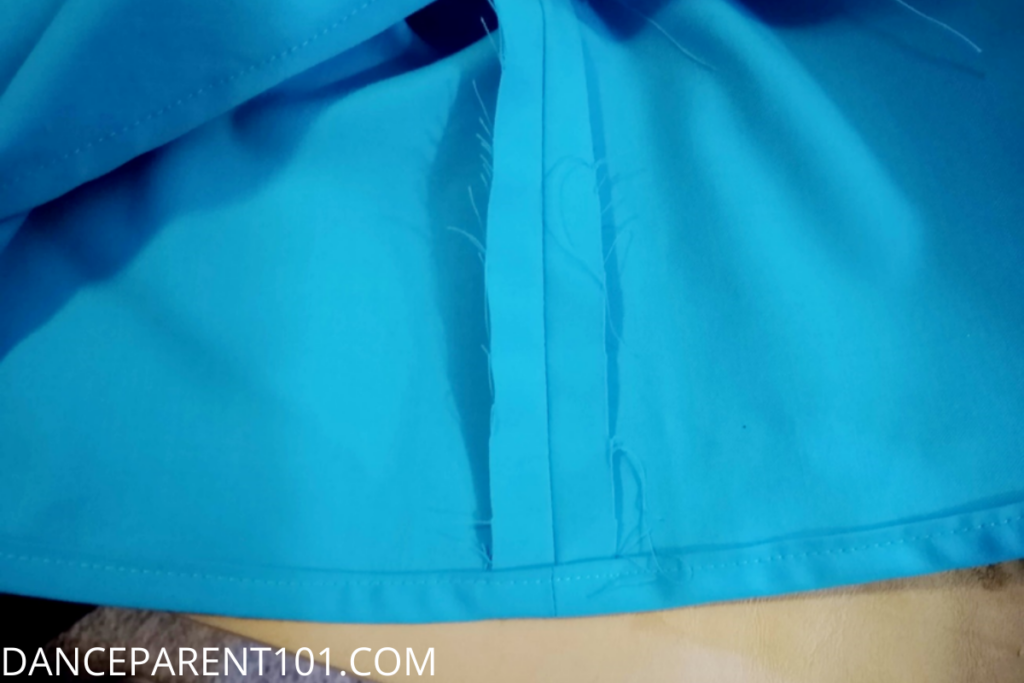
8. Sewing for Reuse – Use Wide Seam Allowances
When sewing costumes, ensure that wide (5/8”) seam allowances are used; which allows you to easily re-fit the costumes for larger dancers.
One year, I was able to let out the seams from a bodice that was made for a 12-year-old fit a 16-year-old who had to take her place at the last minute!!
If a dancer is between two sizes, cut out the larger size and use wider seam allowances. I always leave the opening when I put in elastic. No one can see it, but it allows easy access to the elastic for resizing later. Always think about the next person who might need to wear this costume.
This image shows a 5/8” seam allowance. You can also see that the dress is made of cotton, which ravels and needs to be hemmed:

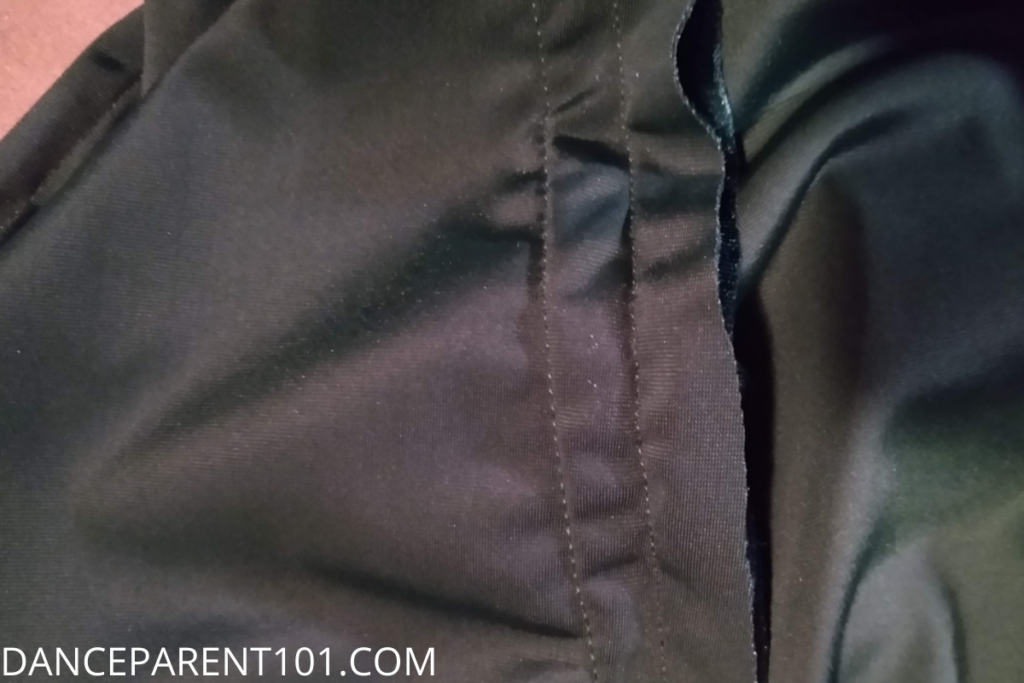
9. Learn Top Tips for Refitting a Costume
Let out existing seam allowances for larger dancers. Take tucks or make deeper seam allowances to re-fit a costume for smaller dancers. When possible, don’t cut anything down to ensure a better fit.
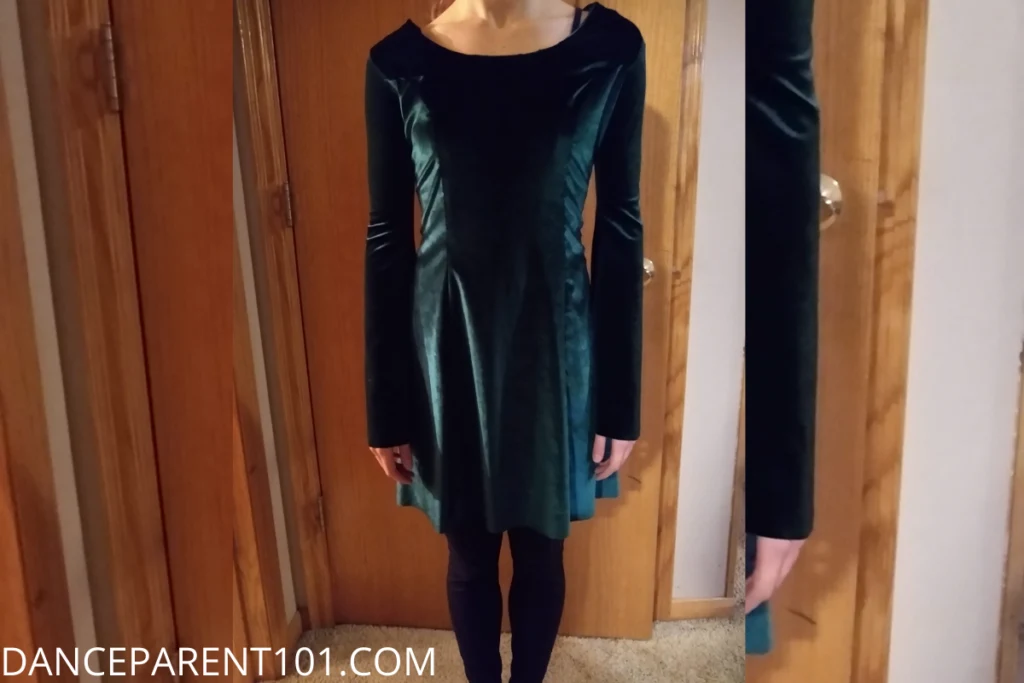
In this example, I increased seam allowances (the deeper seem allowance is on the left) and added a couple of darts to change this dress from a size 5 to a size 1. You can’t even tell once it’s on, and I’ll be able to remove the deeper seam if we need it larger again. Also, I used stretchy fabric, so each size will fit a wide range of bodies.

10. Use Sewing Shortcuts that will help keep your costumes reusable for longer!!
Many shortcuts will save time and help you be more productive.
For example, cutting out patterns with a rotary cutter, not putting a hem in when the fabric won’t ravel, or using hook and eye tape (I dye it) instead of sewing individual hooks and eyes.
But some should be avoided because they’ll make your costumes less usable, such as using glue or hem tape to hem up a too-long skirt.
Dyed hook and eye tape instead of individual hooks and eyes:


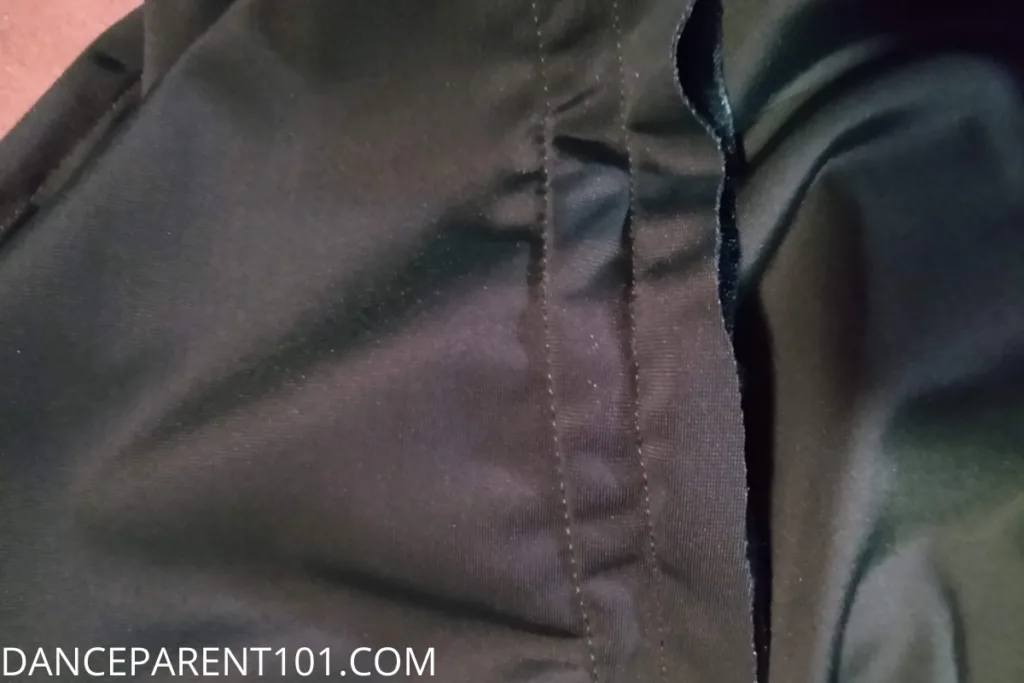
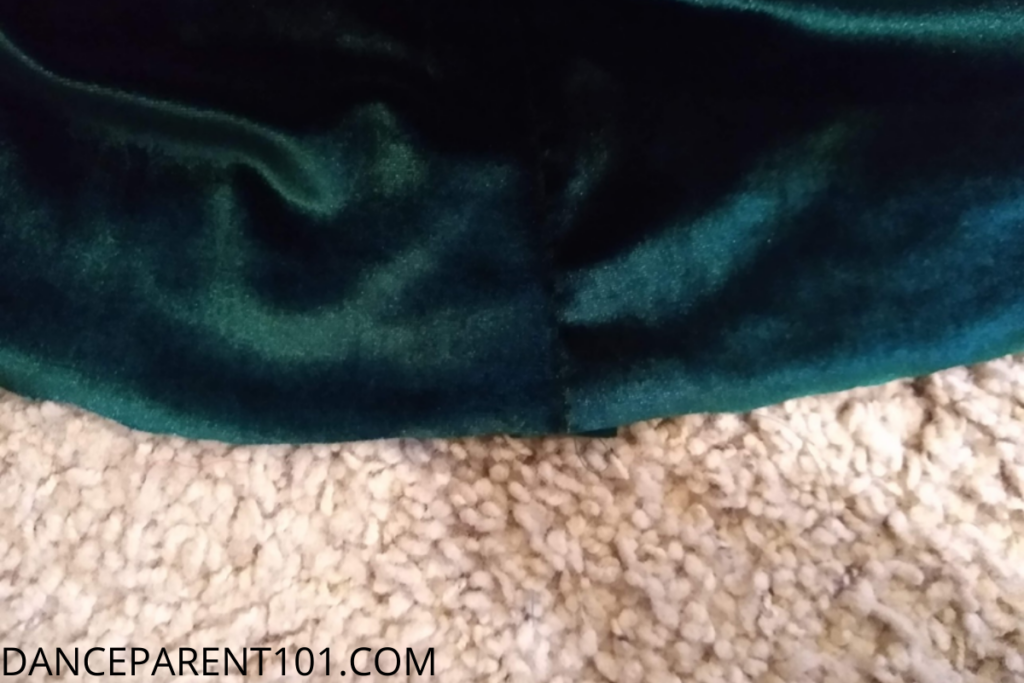
The sleeves and bottom of this stretch velvet costume don’t need to be hemmed:

11. Sew to make Removable Decorations and Embellishments for Reuse
When decorating costumes, sew on the trim and decorations instead of gluing it. This will allow you to style the costume differently for different shows.
Here I am Sewing the trim on my flapper dresses – we can easily remove the trim and replace it to update the costume another year!

12. The Importance of Costume After Care
During a show, make sure that all costumes are properly cared for.
They should always be kept hung nicely, no one should eat or put on makeup when wearing a costume. If they’re wearing something that wrinkles easily (like satin) or anything made out of tulle, they should not sit in their costumes. We are absolute zealots about costume care at our studio.
Anyone caught leaving a costume on the floor is charged for dry-cleaning, and we always have a parent anywhere dancers are (including in the dressing room) to make sure costumes are properly cared for.
After the show, all costumes should be cleaned. For extremely delicate costumes, such as highly decorated bodices, sponge clean anything that needs to be washed with a mild detergent like Dreft, then spray it with something that kills bacteria but doesn’t discolor the fabric, such as vodka or watered-down rubbing alcohol.
Test an inconspicuous spot for colorfastness first though. Store costumes so they won’t be crushed, pulled out of shape, or subject to moist air.
With proper planning, construction, and care, your studio’s costumes can last year after year. Parents will appreciate the cost savings, and dancers love looking in the back of a costume and discovering which older dancer wore it in a previous show.
At the End of the Day – Parents and Dance Students Will Appreciate It
Most parents would rather contribute money and time to create shared, reusable costumes than to buy another costume that’s only used a few times.
It might be fun to own your dancer’s first costumes, but we certainly don’t want 50 of them!
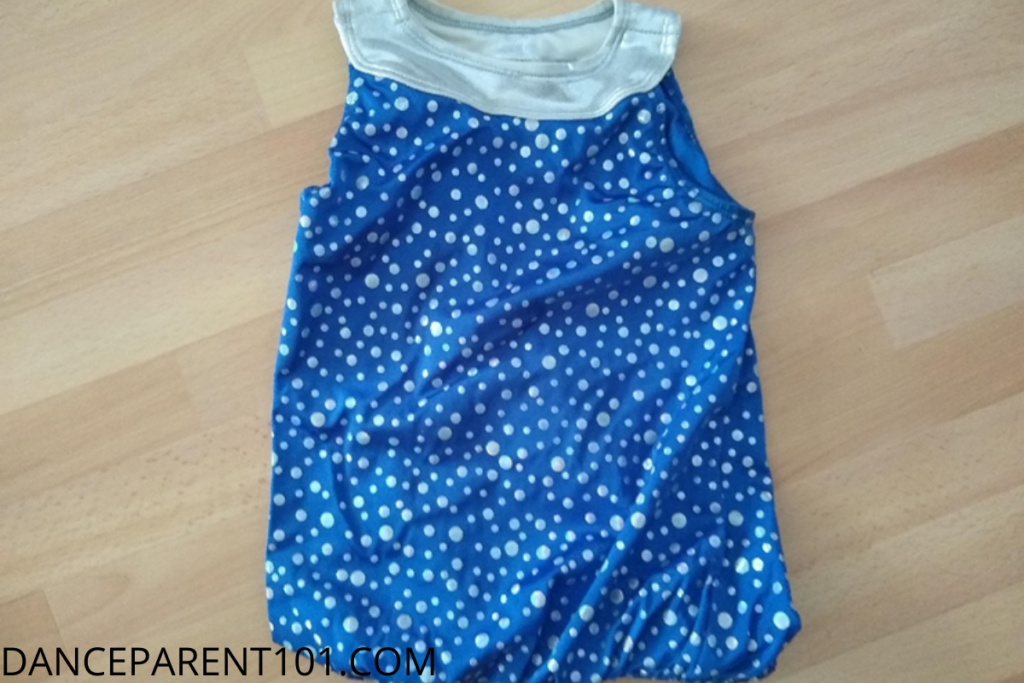
What can we possibly do with a shiny blue top with silver polka-dots (one of the costumes still floating around my house – you can check out the beauty below)? No one wants to buy just one random costume, which makes them hard to resell, so they just get stored for years or thrown away.
Our editor and chief here at Dance Parent – Samantha is now the proud owner of three containers of costumes from when she was younger, many rendered useless as the elastic and synthetic lycra materials have turned hard or disintegrated.
She remembers back to the many nights her mom stayed up late sewing them all – if only their studio had been a little more resourceful and learned some of these tips on how to reuse those costumes year after year!
Happy sewing and costume making!!